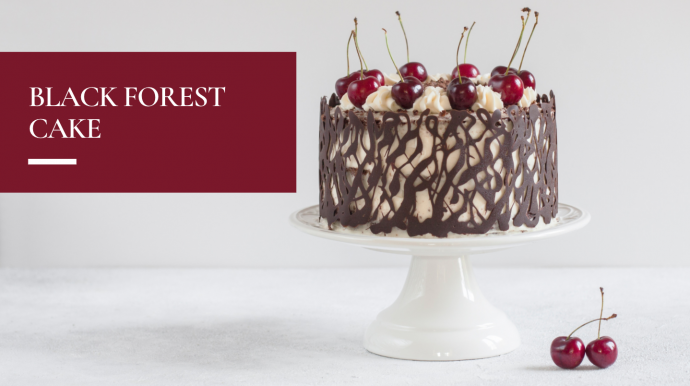
Black Forest Cake + Chocolate Lace Wrap Tutorial

This delicious black forest cake features luscious chocolate cake layers soaked in a cherry liqueur and fresh cherries all covered in a simple whipped cream and chocolate decoration. It's a light and perfectly sweet German dessert that is easy to make and a chocolate-lover's dream! I promise you, It is much better than the ones you can get at the grocery store and this is one of the easiest cakes you will make.
Ingredients
For the Cherry Liqueur Syrup (In order to keep it traditional, I usually make a cherry syrup (using kirsch – cherry liqueur) to brush onto the cake layers):
1/2 cup granulated sugar
1/2 cup water
1/4 cup cherry liqueur
Whipped Cream Frosting:
3 cup whipping cream cold
1/4 cup powdered sugar sifted
For the Cake:
2 cup all-purpose flour
2 cups granulated sugar
3/4 cup cocoa powder sifted
2 tsp baking soda
1 tsp baking powder
1 tsp salt
1/2 cup vegetable oil
1 cup buttermilk room temperature
1 cup hot water
2 large eggs
2 tsp vanilla
Chocolate Lace Wrap:
2 cups 250 g good quality dark chocolate chopped
Wax paper
Frosting bag with round tip
For Assembly:
2 1/2 cups cherries pitted and cut in half
1 bar dark chocolate for shavings (optional)
cherries
Directions
Step1
Preheat oven to 350F, grease two 8" round baking pans and dust with cocoa powder. Line bottoms with parchment.
Step 2
Place all dry ingredients into the bowl of a stand mixer fitted with a paddle attachment. Stir to combine.
Step 3
In a medium bowl whisk all wet ingredients (pour hot water in slowly as not to cook the eggs).
Step 4
Add wet ingredients to dry and mix on medium for 2-3 mins. Batter will be very thin.
Step 5
Pour evenly into prepared pans. I used a kitchen scale to ensure the batter is evenly distributed.
Bake for 45 mins or until a cake tester comes out mostly clean.
Step 6
Cool 10 minutes in the pans then turn out onto a wire rack to cool completely.
Step 7 - Cherry Liqueur Syrup:
Place sugar and water into a small pot. Stir and bring to a boil. Simmer for 1 min then remove from heat. Stir in cherry liqueur and allow to cool completely.
Step 8 - Whipped Cream Frosting:
Whip cream and powdered sugar until stiff peaks. Ideally in a cold bowl with a cold whisk.
Step 9 - Assembly:
Cut each cake layer in half horizontally.
Place one layer of cake on a cake stand or serving plate. Brush generously with cherry syrup.
Top with approximately 1 cup whipped cream and spread evenly. Top with approximately 1 cup of cherries and gently press them into the whipped cream. Repeat with remaining layers and frost the outside of the cake.
Decorate with chocolate cherries and a chocolate lace wrap.
How to make the chocolate lace wrap
Easy chocolate cake decoration to instantly add a wow-factor to your homemade cake. It’s so easy to make this chocolate cage, you don’t even need any special skills!
Step 1
To prepare the wax paper, measure the cake circumference and cut 2 strips of wax paper for that length. For this cake, I needed 2 15-inch strips. Height of the strips depends on the design you're planning, whether you want it the same height as your cake, or taller, etc. Just add an inch or so extra on top of the height of your design.
Step 2
Using a ruler and a pen, draw 2 lines on prepared wax papers that will guide you to draw the design.
Step 3
To melt the chocolate, place chocolate in microwave-safe bowl. Start with 1 minute at 50% power, stir well and microwave for another 30 seconds at 50% power. Repeat until chocolate is fully melted. Transfer the melted chocolate into a frosting bag with round tip.
Step 4
Start piping your design within the lines, making sure it's thick enough to stand. Too thin lines are too fragile.
Step 5
Set for 30-60 minutes at room temperature. Or in a pinch, you can put it in a fridge, checking it every 5 minutes or so. It should be firm, but still pliable. You don't want the chocolate too hard, or it'll break.
Step 6
Carefully lift the wax strip with chocolate design, and wrap around the cake. Repeat with the other side.
Carefully peel off the wax paper. If the chocolate is a bit too soft, you can put the cake in the fridge for 30 minutes, or longer, and then peel the wax paper off.
That’s it!


